

MAKING 7 - 1/700scale Multi-Material Kit : Battleship YAMATO
"1/700scale Multi-Material Kit : 日本海軍 戦艦 大和"の製作メイキングをUPしていきます。
組み立て説明書の順番で進んでいきますので、組む際の参考にしてください。
今回は、甲板にデカールを貼る工程です。
Continuing to the making of "1/700scale Multi-Material Kit : Battleship YAMATO".
You may reference to this “making of” article when you assembling the kit.
This update will be attaching the decals to the deck.
 この工程は説明書の[POINT A]として組み立て上の説明が書かれています。このデカールは通常の水転写式デカールとは貼り方が異なる特殊なものです。ですので特に注意事項として説明書に記してあります。このメイキングでは、その補足説明をしたいと思います。
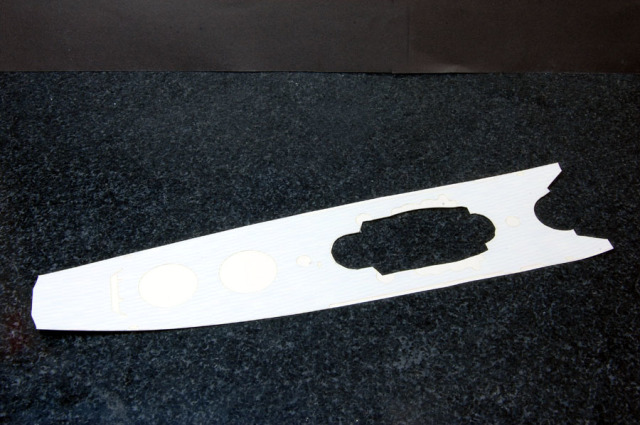
まずは説明書通りエッチング甲板を塗装します。
You may also following POINT A in the instruction manual to perform the attaching. Since the decal is different from the generic decals that use water, the way to attach this decal has been already stated in the instruction manual.
Please treat this update as the supplement to the manual.
Please get the photo etch of the deck painted first.
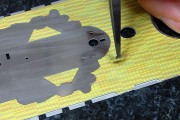
 次に必要なデカールを余白を残さず切り出します。この作業はいらないデカールの余白をカットする為というより、貼る際の位置あわせの為に必要です。
Then cut the decal out without any white spacing left. To attach the decal precisely, you must cut the decal well.
 ここでこのデカールの構成について説明しておきます。
印刷面(数字)が見える面を上にして、上から
(1)透明保護フィルム
(2)反転印刷されたデカール面
(3)薄紙シート
(4)厚めの台紙
という構成になっています。以後、この番号で説明していきます。
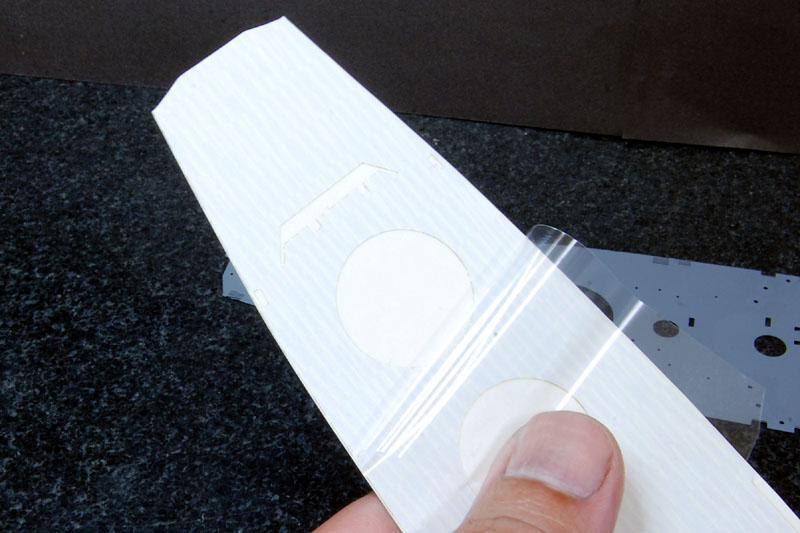
まず、(1)透明保護フィルムの端部、前の先端部分と後ろの先端部分のみをはがします。全部はがしてしまわないようにしてください。
Here is the composition of the decal in detail.
Starting from the surface with numbers that you can see :
(1). transparent protection film
(2). reversely printed decal
(3). paper sheet
(4). thick back paper
The following will be using numbers instead of the full names.
First, peel off the tip of the head and tail of (1) only. Do not remove the film right now.
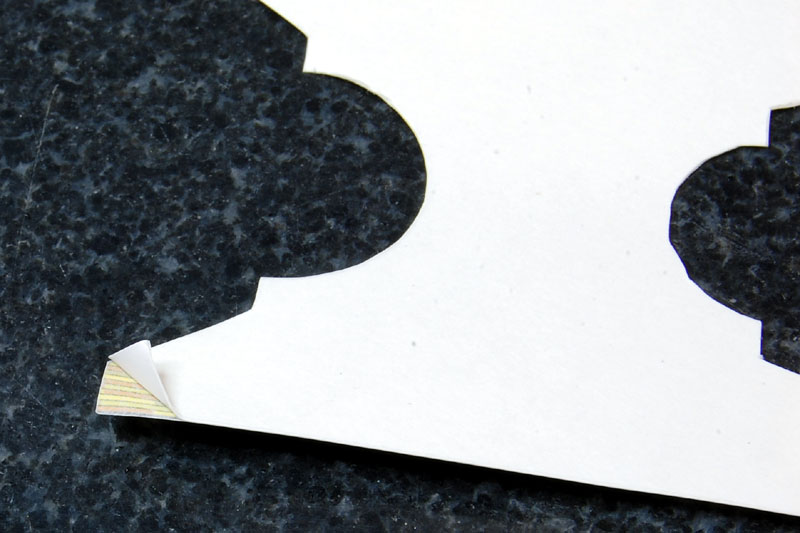
 次に、裏側の(4)厚めの台紙の角を少しはがしておきます。こうすることによって甲板に貼った後に台紙がはがしやすくなります。
Then remove the corner only of (4). This action is for the easy removing of (4) when attaching to the deck.
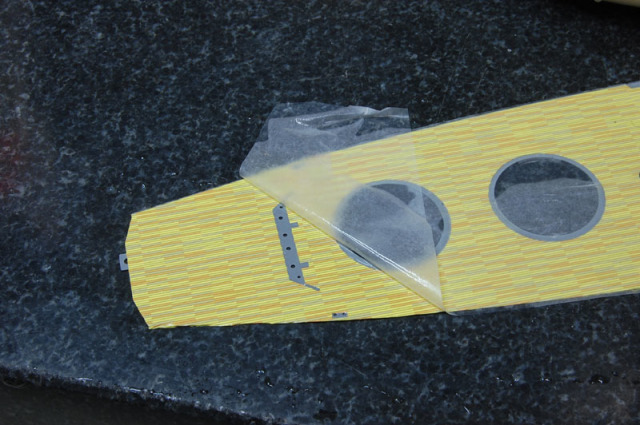
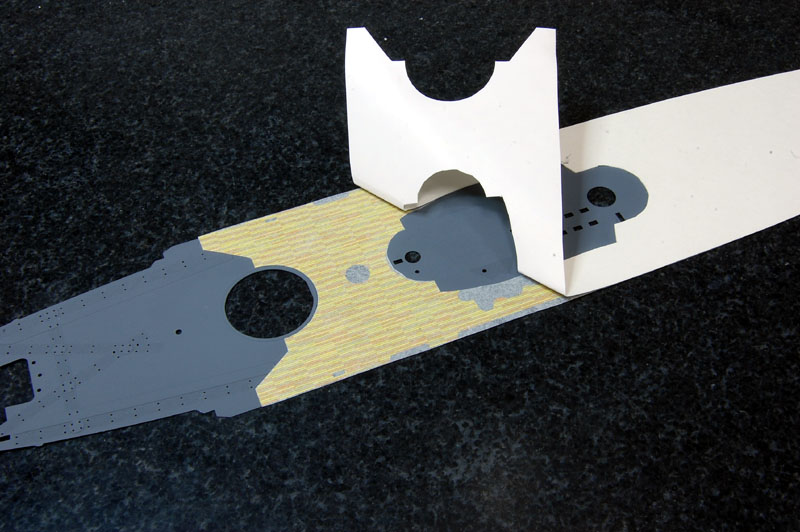
 そして、上面の(2)反転印刷されたデカール面を甲板面にのせます。つまり、裏返して(4)厚めの台紙が上になるように甲板に置く、ということです。
ここで甲板に位置をしっかりと合わせる必要があります。先ほど(1)透明保護フィルムの両端部分のみはがした状態ですので、艦首と艦尾方向の甲板にしっかりと位置をあわせてください。
両端の位置が決まったらその部分を少し押さえて密着させます。そして(1)透明保護フィルムをすべてはがし、上から全体を押さえて密着させます。
次に(4)厚めの台紙をゆっくりとはがしていきます。
Then place (2) to the deck, i.e., you will be placing the decal with (4) on the top.
Adjust the position of the decals now. Since the tip of (1) has been removed, please pay attention in adjusting the position.
After you have adjusted the exact position, slightly press to fix the position. Remove (1) and slightly press the decal fix the position.
Then remove (4) slowly.
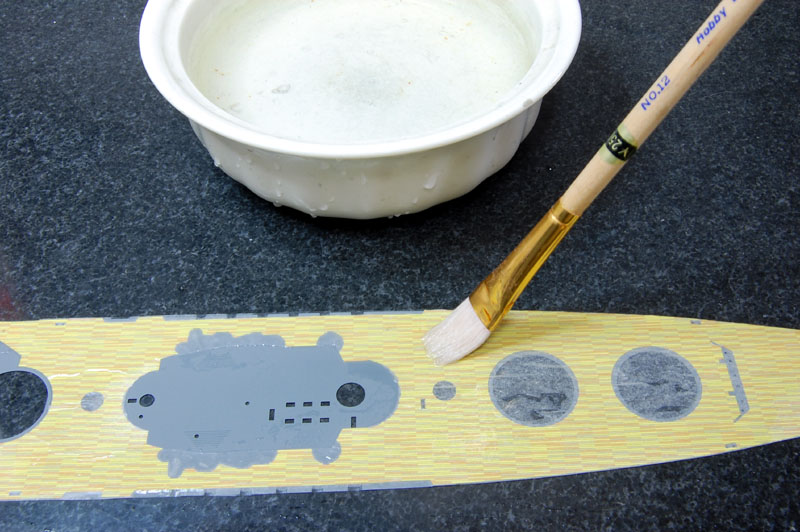
 次に筆で水をつけていきます。この作業でデカールが甲板に完全に密着します。
Use a paintbrush to apply water to the decal. The decal now will be stuck completely to the deck.
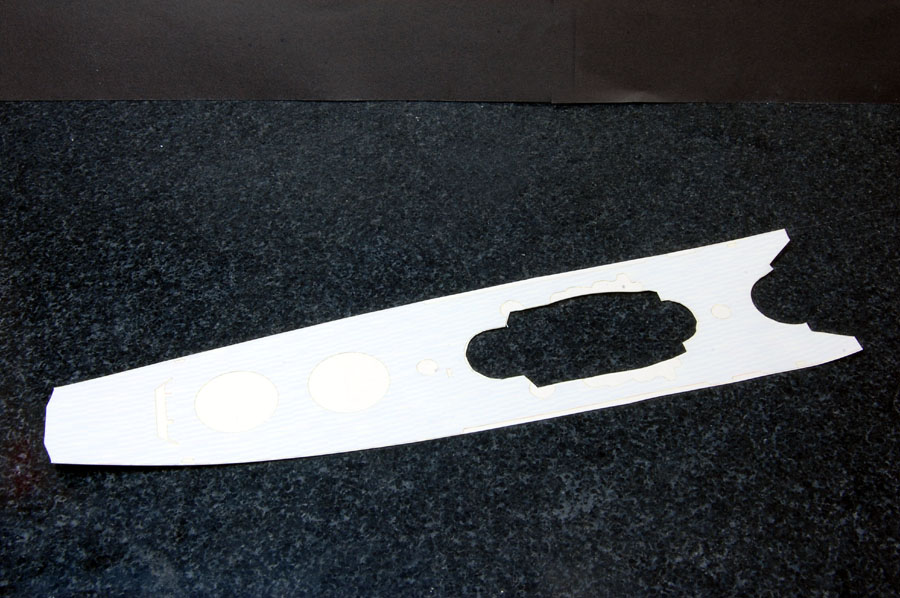
 (3)薄紙シートをゆっくりとはがします。
Remove (3) slightly.
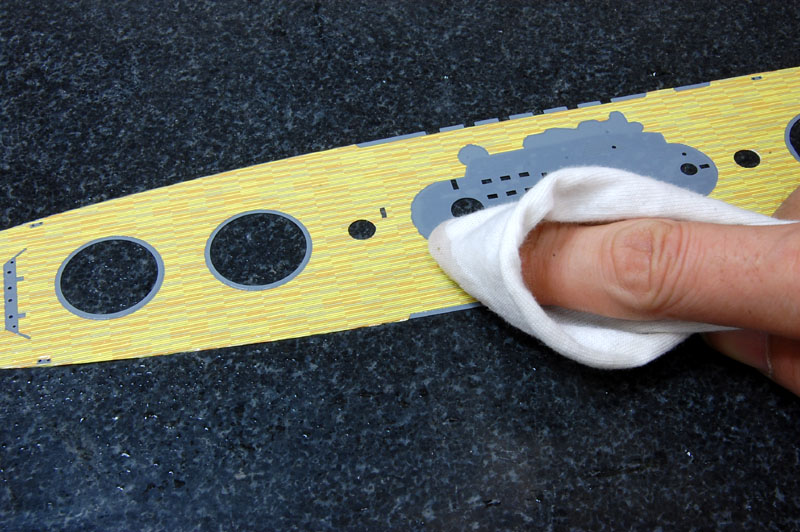
 最後に、柔らかい布等で水分をふき取って完了です。糊が表面に残ってる場合は、水分を含ませた布や綿棒でそっと拭けば取れます。
このデカールの木甲板は少し明るめの色合いで作られています。ですので、しっかりデカールを乾燥させた後、グレー系のエナメル塗料でウォッシングを行うと落ち着いた感じに仕上がります。
なお、説明書にも明記していますが、エナメル塗料以外の塗料をウェザリングに使ったり、クリアコートを行ったりするとデカール面が犯されてしまうので絶対に行わないでください。
続きます。
Absorb excess water with soft cloth.
The attach of decal is completed. If there is some paper remaining on the decal, use cotton bud with water to remove it.
The colouring of this decal has been set to a little bit lighter colour to match the wooden deck. After the decal is completely dried, use enamel paint to perform weathering to have a more natural presentation of the deck.
Please use enamel paint only to perform weathering process only and do not use other paints and clear coating paint. They will harm the decal.
To be continued. . .
MAKING 8 - 1/700scale Multi-Material Kit : Battleship YAMATO
組み立て説明書の順番で進んでいきますので、組む際の参考にしてください。
今回は、甲板にデカールを貼る工程です。
Continuing to the making of "1/700scale Multi-Material Kit : Battleship YAMATO".
You may reference to this “making of” article when you assembling the kit.
This update will be attaching the decals to the deck.
 この工程は説明書の[POINT A]として組み立て上の説明が書かれています。このデカールは通常の水転写式デカールとは貼り方が異なる特殊なものです。ですので特に注意事項として説明書に記してあります。このメイキングでは、その補足説明をしたいと思います。
まずは説明書通りエッチング甲板を塗装します。
You may also following POINT A in the instruction manual to perform the attaching. Since the decal is different from the generic decals that use water, the way to attach this decal has been already stated in the instruction manual.
Please treat this update as the supplement to the manual.
Please get the photo etch of the deck painted first.
 次に必要なデカールを余白を残さず切り出します。この作業はいらないデカールの余白をカットする為というより、貼る際の位置あわせの為に必要です。
Then cut the decal out without any white spacing left. To attach the decal precisely, you must cut the decal well.
 ここでこのデカールの構成について説明しておきます。
印刷面(数字)が見える面を上にして、上から
(1)透明保護フィルム
(2)反転印刷されたデカール面
(3)薄紙シート
(4)厚めの台紙
という構成になっています。以後、この番号で説明していきます。
まず、(1)透明保護フィルムの端部、前の先端部分と後ろの先端部分のみをはがします。全部はがしてしまわないようにしてください。
Here is the composition of the decal in detail.
Starting from the surface with numbers that you can see :
(1). transparent protection film
(2). reversely printed decal
(3). paper sheet
(4). thick back paper
The following will be using numbers instead of the full names.
First, peel off the tip of the head and tail of (1) only. Do not remove the film right now.
 次に、裏側の(4)厚めの台紙の角を少しはがしておきます。こうすることによって甲板に貼った後に台紙がはがしやすくなります。
Then remove the corner only of (4). This action is for the easy removing of (4) when attaching to the deck.
 そして、上面の(2)反転印刷されたデカール面を甲板面にのせます。つまり、裏返して(4)厚めの台紙が上になるように甲板に置く、ということです。
ここで甲板に位置をしっかりと合わせる必要があります。先ほど(1)透明保護フィルムの両端部分のみはがした状態ですので、艦首と艦尾方向の甲板にしっかりと位置をあわせてください。
両端の位置が決まったらその部分を少し押さえて密着させます。そして(1)透明保護フィルムをすべてはがし、上から全体を押さえて密着させます。
次に(4)厚めの台紙をゆっくりとはがしていきます。
Then place (2) to the deck, i.e., you will be placing the decal with (4) on the top.
Adjust the position of the decals now. Since the tip of (1) has been removed, please pay attention in adjusting the position.
After you have adjusted the exact position, slightly press to fix the position. Remove (1) and slightly press the decal fix the position.
Then remove (4) slowly.
 次に筆で水をつけていきます。この作業でデカールが甲板に完全に密着します。
Use a paintbrush to apply water to the decal. The decal now will be stuck completely to the deck.
 (3)薄紙シートをゆっくりとはがします。
Remove (3) slightly.
 最後に、柔らかい布等で水分をふき取って完了です。糊が表面に残ってる場合は、水分を含ませた布や綿棒でそっと拭けば取れます。
このデカールの木甲板は少し明るめの色合いで作られています。ですので、しっかりデカールを乾燥させた後、グレー系のエナメル塗料でウォッシングを行うと落ち着いた感じに仕上がります。
なお、説明書にも明記していますが、エナメル塗料以外の塗料をウェザリングに使ったり、クリアコートを行ったりするとデカール面が犯されてしまうので絶対に行わないでください。
続きます。
Absorb excess water with soft cloth.
The attach of decal is completed. If there is some paper remaining on the decal, use cotton bud with water to remove it.
The colouring of this decal has been set to a little bit lighter colour to match the wooden deck. After the decal is completely dried, use enamel paint to perform weathering to have a more natural presentation of the deck.
Please use enamel paint only to perform weathering process only and do not use other paints and clear coating paint. They will harm the decal.
To be continued. . .
MAKING 8 - 1/700scale Multi-Material Kit : Battleship YAMATO
MAKING
|
