

MAKING 1 - 1/700scale Multi-Material Kit : Battleship YAMATO
"1/700scale Multi-Material Kit : 日本海軍 戦艦 大和"の製作メイキングをUPしていきます。
第一回目は、キット製作時に使う工具について。
This is the making guide of "1/700scale Multi-Material Kit : Battleship YAMATO".
We will talk about the tools that are needed to build a excellent model.
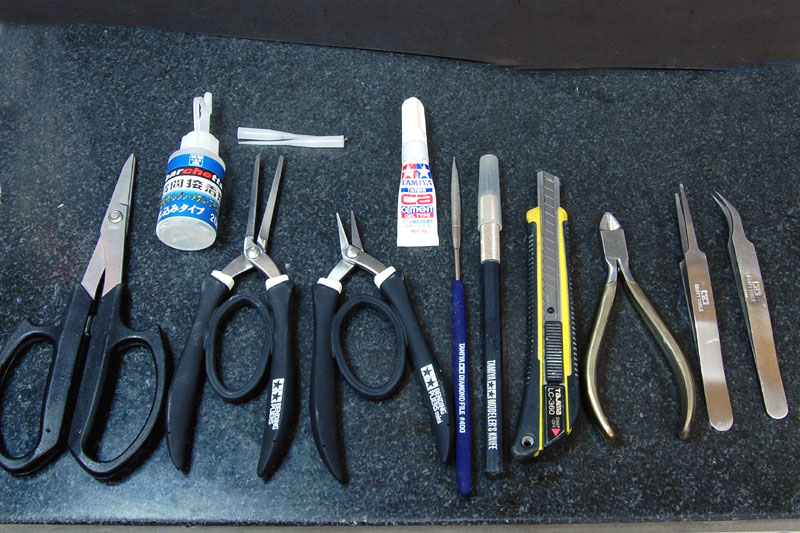
 カッター、デザインナイフ、ピンセット等は模型用でなくても普通の市販品で問題ありません。(もちろん、高価な専用のものほど精度や使いやすさが上なのは言うまでもありませんが。)
エッチング曲げ用にエッチングベンダー、エッチングランナー部分の仕上げにエッチングヤスリ(写真はタミヤ製)、これらはエッチングの作業に必要です。
それにプラス、エッチングを切り離す為のハサミはあったほうがいいです。エッチング専用のものでなくてもかまいませんが、エッチング用と決めたハサミは他の素材を切るのには使わないようにしてください。切れ味が落ちます。
瞬間接着剤は、サラサラの流し込みタイプのものと、ゼリー状のもの、二種類は必要です。ゼリー状瞬着は流し込みタイプに比べて硬化するまでわずかながら時間がありますので、少しは位置を調整することができます。場合によっては、ゼリー状で位置が決まった後に流し込みタイプを流し込んで隙間なくなじませ接着する、等の使い方もあります。
説明書にはどちらの接着剤が適しているか組み立て工程ごとに記してありますので、それを参考に選んでください。
Ordinary cutters and tweezers sold in the market are both capable to do so, of course they are not so easy to use when compare with those specialized for modeling.
The photo etch bender is used for bending the etching parts, and the file is for shedding the cut edge (Tamiya products are shown in the photos). They are very useful when dealing with the photo etch parts.
In addition to the tools mentioned above, a pair of scissors is good for cutting the photo etch parts from the sheet. The scissors need not be specialized for cutting the photo etch sheet, however, please don’t use the scissors to cut other objects if you have used it for cutting photo etch sheet. It will harm the blades.
Last but not least, you will need instant adhesives in both fluid type and jelly type. The jelly type lets you have a little bit of time to adjust the position after you applied and attached the parts, when compared to the fluid type.
Depends on the situation, usually you may use some jelly type to fix the position first and use the fluid type to stick it firmly.
The instruction manual has suggested which one may be used on which parts, you can reference to the manual for more.
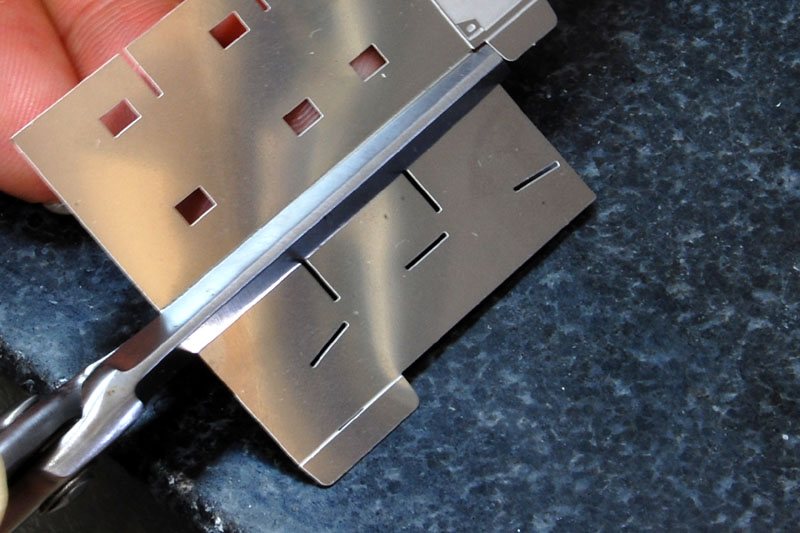
 では具体的に見ていきましょう。エッチングベンダーから。写真のような大版のエッチングを曲げる場合、しっかりと曲げ位置を確認してそれに沿ってベンダーではさみます。
Let’s see how the tool actually works.
Starting from the photo etch bender. To bend the photo etch well, confirm to grab the bending line precisely and grab the line firmly. Then you should bend the photo etch well.
 そしてしっかりベンダーで押さえながら少しずつ指で曲げていきます。
Bend it slowly and carefully.
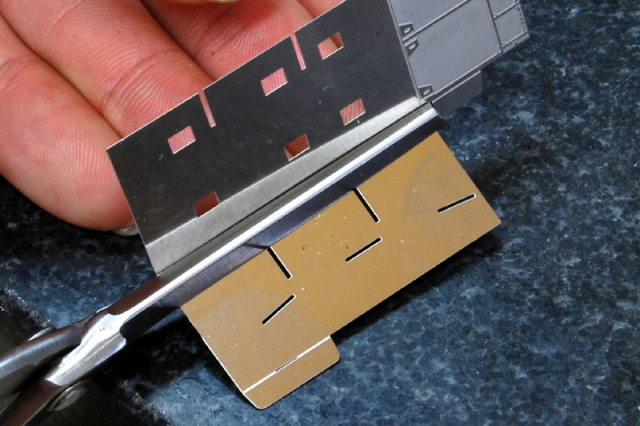
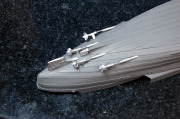
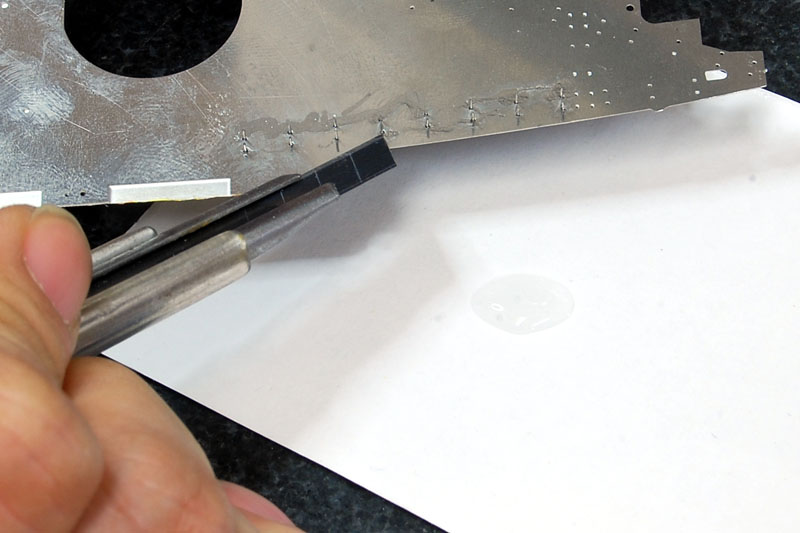
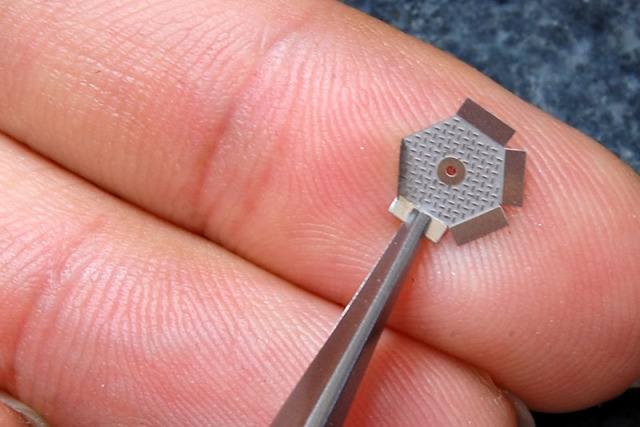 折れ線全部をベンダーではさめない小さいエッチングパーツの場合は、写真のように狭い部分をベンダーではさみ、広い部分を指で押さえて曲げていくとうまくいきます。
To bend the small parts like the one shown on the photo, grab the narrow part by the tip of the bender, and bend the main part by your finger.
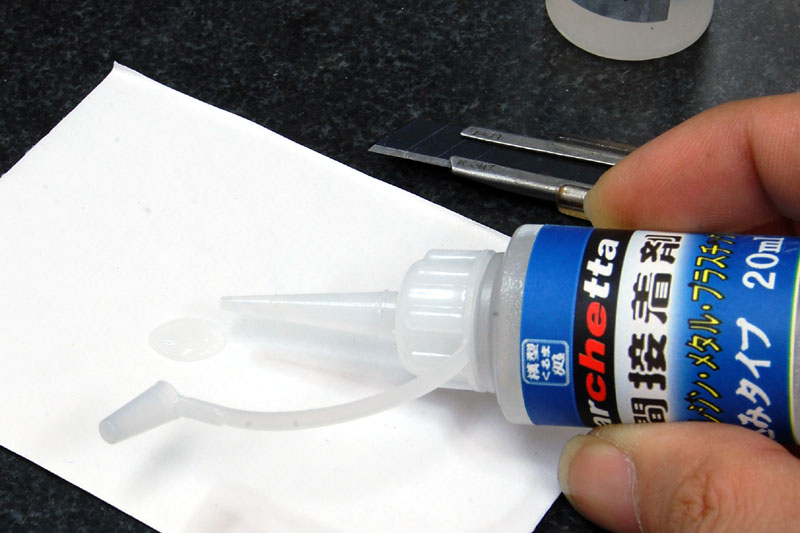
 続いて瞬間接着剤です。流し込みタイプは、ボトルからパーツに直接流すと大量に付いてしまい仕上がりが汚くなってしまいますので、必ずトレイのようなものに少量づつ出して使います。
Then the adhesives. Do not apply the fluid type directly from the bottle, it will harm your kit and very difficult to clean the excess adhesives. You should pour a certain amount to a tray first.
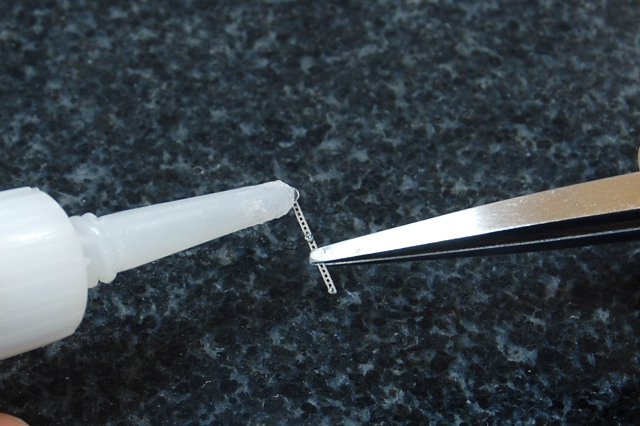
 そしてデザインナイフやカッター等の先でほんの少しすくってパーツの隙間に流し込むときれいに接着できます。
Then use something narrow and sharp (like the cutter or design knife)to dip the adhesives to the position you want to apply adhesives.
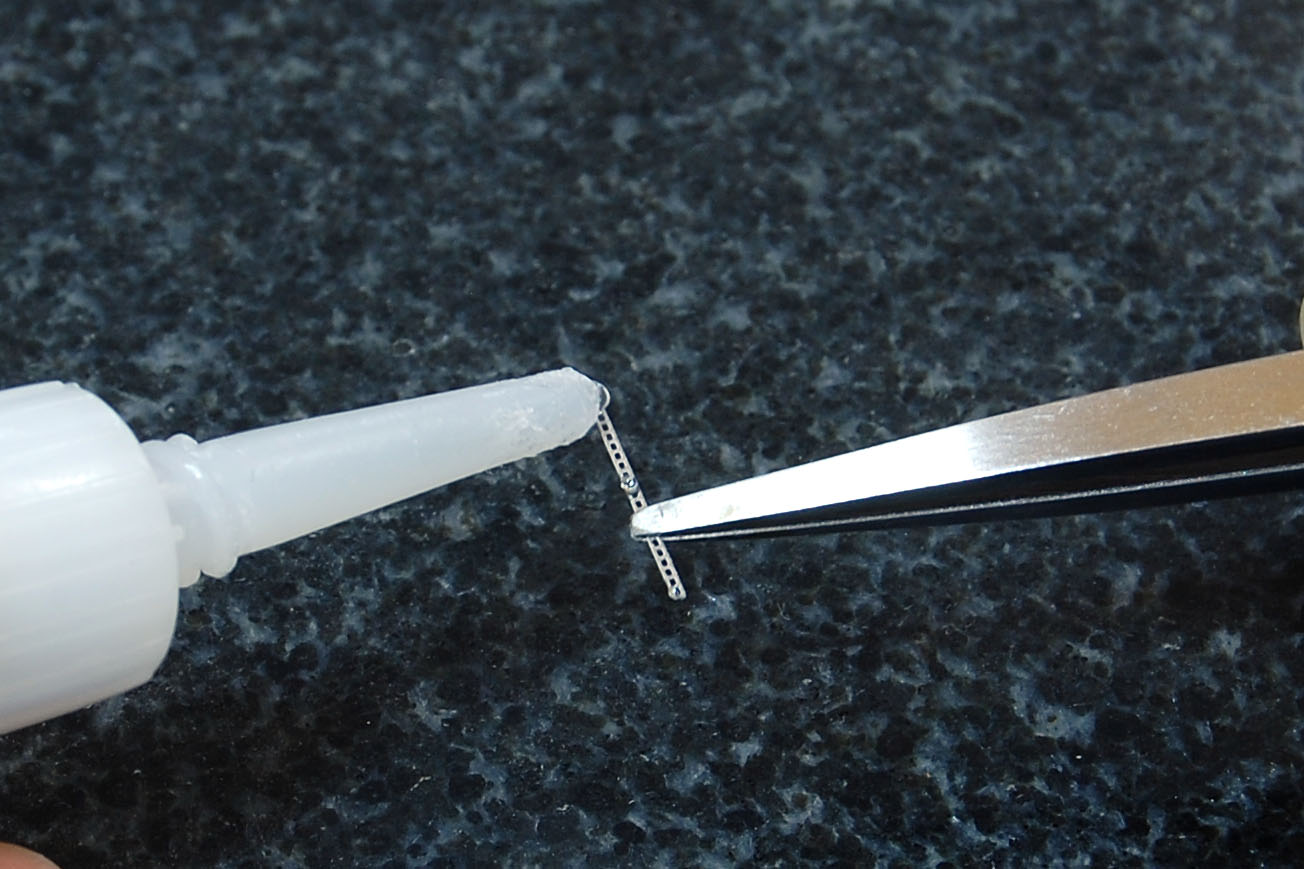
 ゼリー状瞬着はパーツに点付けが基本で、付けすぎないようにしてください。
The jelly type is only applying on the tips of the parts and just a little amount for positioning, so just paying attention not to squeeze too much to the parts is fine.
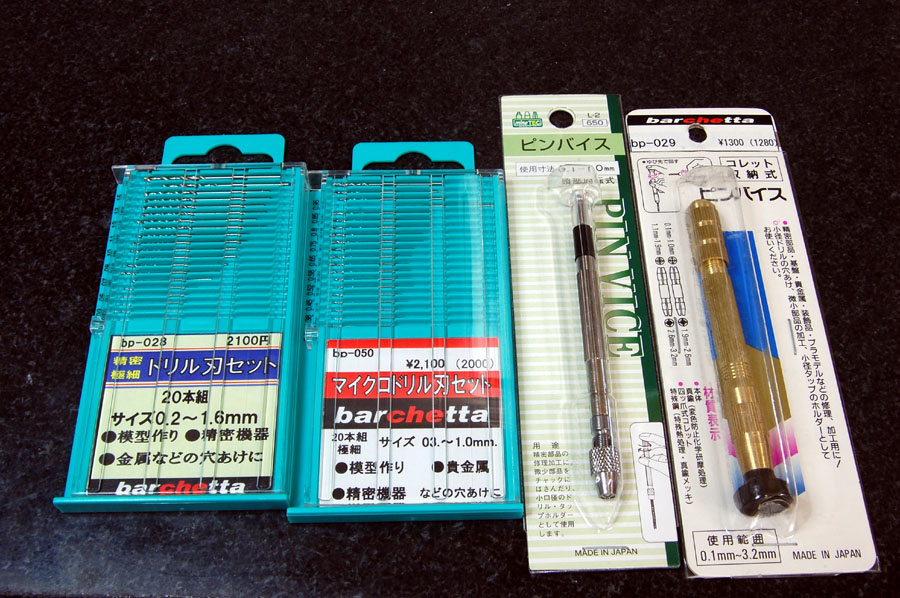
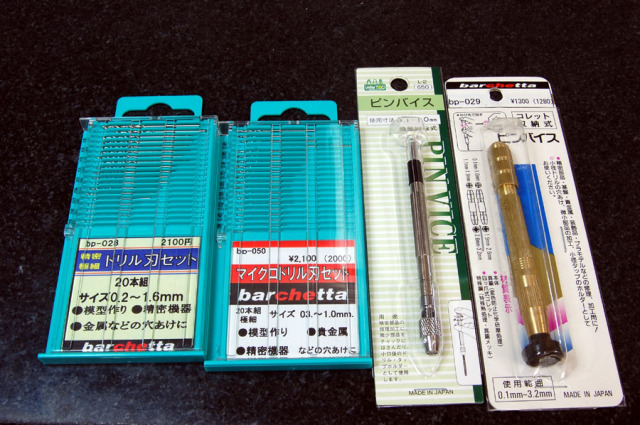 そして、穴あけ用にピンバイス。ピンバイス本体は複数本あれば作業がはかどります。ドリル刃は各種サイズがセットになった写真のものが一式あると便利です。
The pin vice for drilling tiny holes and spare pin vices are useful and they can speed up your making progress.
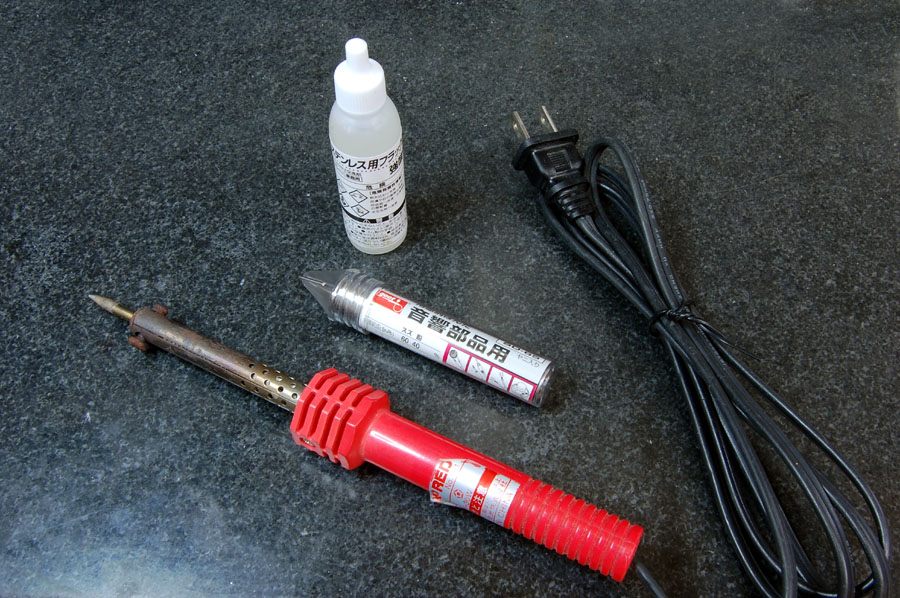
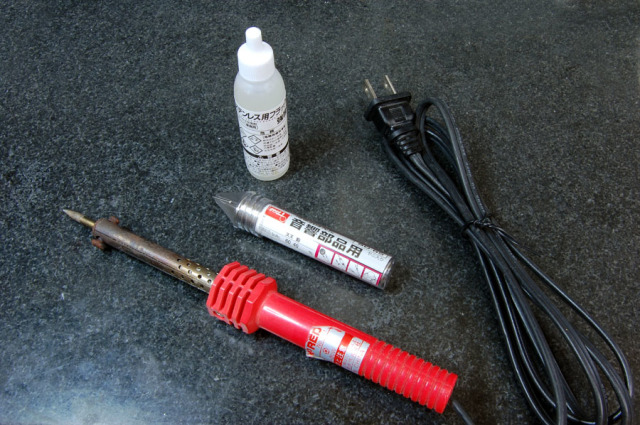 基本、パーツの接着には瞬間接着剤があれば問題ないのですが、エッチング同士で強度が必要な部分にはやはりハンダ付けを行ったほうがいい場合もあります。腕に自信がある方は挑戦してみると仕上がりがワンランク上がります。ハンダゴテは普通に市販されている低価格のもので問題ありません。その中でもコテ先端が細いもので電力30Wくらいのものが適しています。
はんだは低融点のものが使いやすいです。下地に塗布するフラックスは、ステンレス用を選びましょう。
次回以降、具体的にキットの組み立て工程にて説明していきます。
Basically, all parts will be fine to stick together using the instant adhesives, however shouldering iron is recommended to be used when dealing with photo etch parts.
The ordinary shouldering iron can be used, but a find shouldering iron head and 30W one is recommended. The shouldering iron which has lower melting temperature is better. For the base please choose the solvent for stainless steel.
Next making will be talking about using these tools in actual work to build the YAMATO.
MAKING2 - 1/700scale Multi-Material Kit : Battleship YAMATO
第一回目は、キット製作時に使う工具について。
This is the making guide of "1/700scale Multi-Material Kit : Battleship YAMATO".
We will talk about the tools that are needed to build a excellent model.
 カッター、デザインナイフ、ピンセット等は模型用でなくても普通の市販品で問題ありません。(もちろん、高価な専用のものほど精度や使いやすさが上なのは言うまでもありませんが。)
エッチング曲げ用にエッチングベンダー、エッチングランナー部分の仕上げにエッチングヤスリ(写真はタミヤ製)、これらはエッチングの作業に必要です。
それにプラス、エッチングを切り離す為のハサミはあったほうがいいです。エッチング専用のものでなくてもかまいませんが、エッチング用と決めたハサミは他の素材を切るのには使わないようにしてください。切れ味が落ちます。
瞬間接着剤は、サラサラの流し込みタイプのものと、ゼリー状のもの、二種類は必要です。ゼリー状瞬着は流し込みタイプに比べて硬化するまでわずかながら時間がありますので、少しは位置を調整することができます。場合によっては、ゼリー状で位置が決まった後に流し込みタイプを流し込んで隙間なくなじませ接着する、等の使い方もあります。
説明書にはどちらの接着剤が適しているか組み立て工程ごとに記してありますので、それを参考に選んでください。
Ordinary cutters and tweezers sold in the market are both capable to do so, of course they are not so easy to use when compare with those specialized for modeling.
The photo etch bender is used for bending the etching parts, and the file is for shedding the cut edge (Tamiya products are shown in the photos). They are very useful when dealing with the photo etch parts.
In addition to the tools mentioned above, a pair of scissors is good for cutting the photo etch parts from the sheet. The scissors need not be specialized for cutting the photo etch sheet, however, please don’t use the scissors to cut other objects if you have used it for cutting photo etch sheet. It will harm the blades.
Last but not least, you will need instant adhesives in both fluid type and jelly type. The jelly type lets you have a little bit of time to adjust the position after you applied and attached the parts, when compared to the fluid type.
Depends on the situation, usually you may use some jelly type to fix the position first and use the fluid type to stick it firmly.
The instruction manual has suggested which one may be used on which parts, you can reference to the manual for more.
 では具体的に見ていきましょう。エッチングベンダーから。写真のような大版のエッチングを曲げる場合、しっかりと曲げ位置を確認してそれに沿ってベンダーではさみます。
Let’s see how the tool actually works.
Starting from the photo etch bender. To bend the photo etch well, confirm to grab the bending line precisely and grab the line firmly. Then you should bend the photo etch well.
 そしてしっかりベンダーで押さえながら少しずつ指で曲げていきます。
Bend it slowly and carefully.
 折れ線全部をベンダーではさめない小さいエッチングパーツの場合は、写真のように狭い部分をベンダーではさみ、広い部分を指で押さえて曲げていくとうまくいきます。
To bend the small parts like the one shown on the photo, grab the narrow part by the tip of the bender, and bend the main part by your finger.
 続いて瞬間接着剤です。流し込みタイプは、ボトルからパーツに直接流すと大量に付いてしまい仕上がりが汚くなってしまいますので、必ずトレイのようなものに少量づつ出して使います。
Then the adhesives. Do not apply the fluid type directly from the bottle, it will harm your kit and very difficult to clean the excess adhesives. You should pour a certain amount to a tray first.
 そしてデザインナイフやカッター等の先でほんの少しすくってパーツの隙間に流し込むときれいに接着できます。
Then use something narrow and sharp (like the cutter or design knife)to dip the adhesives to the position you want to apply adhesives.
 ゼリー状瞬着はパーツに点付けが基本で、付けすぎないようにしてください。
The jelly type is only applying on the tips of the parts and just a little amount for positioning, so just paying attention not to squeeze too much to the parts is fine.
 そして、穴あけ用にピンバイス。ピンバイス本体は複数本あれば作業がはかどります。ドリル刃は各種サイズがセットになった写真のものが一式あると便利です。
The pin vice for drilling tiny holes and spare pin vices are useful and they can speed up your making progress.
 基本、パーツの接着には瞬間接着剤があれば問題ないのですが、エッチング同士で強度が必要な部分にはやはりハンダ付けを行ったほうがいい場合もあります。腕に自信がある方は挑戦してみると仕上がりがワンランク上がります。ハンダゴテは普通に市販されている低価格のもので問題ありません。その中でもコテ先端が細いもので電力30Wくらいのものが適しています。
はんだは低融点のものが使いやすいです。下地に塗布するフラックスは、ステンレス用を選びましょう。
次回以降、具体的にキットの組み立て工程にて説明していきます。
Basically, all parts will be fine to stick together using the instant adhesives, however shouldering iron is recommended to be used when dealing with photo etch parts.
The ordinary shouldering iron can be used, but a find shouldering iron head and 30W one is recommended. The shouldering iron which has lower melting temperature is better. For the base please choose the solvent for stainless steel.
Next making will be talking about using these tools in actual work to build the YAMATO.
MAKING2 - 1/700scale Multi-Material Kit : Battleship YAMATO
MAKING
|
