

MAKING 13 - 1/700scale Multi-Material Kit : Battleship YAMATO
"1/700scale Multi-Material Kit : 日本海軍 戦艦 大和"の製作メイキングをUPしていきます。
組み立て説明書の順番で進んでいきますので、組む際の参考にしてください。
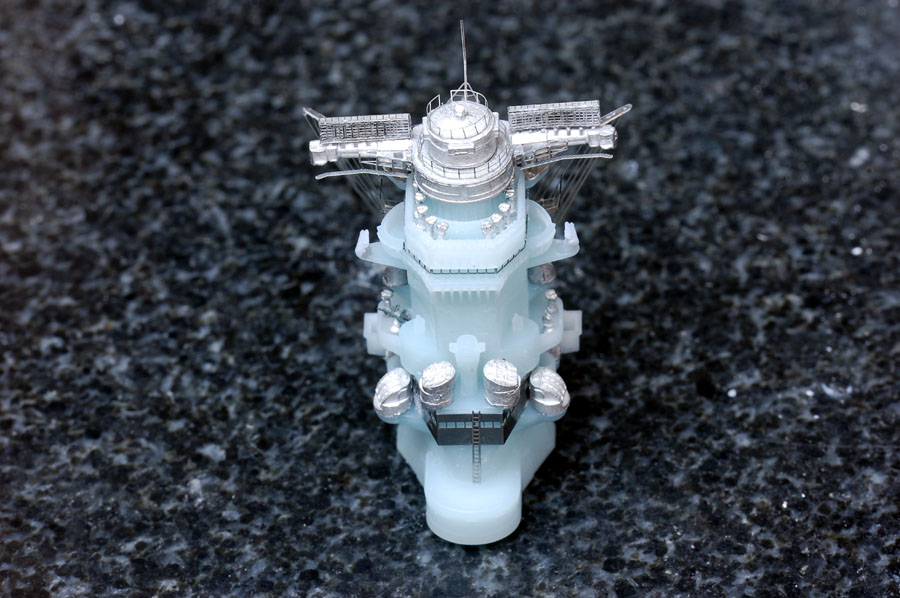
艦橋と煙突の組み立てです。
Continuing to the making of "1/700scale Multi-Material Kit : Battleship YAMATO".
You may reference to this “making of” article when you assembling the kit.
This update is assembling the bridge and chimney.
 艦橋は戦艦の顔ともいうべき部分ですので、丁寧に仕上げるとぐっと完成度が上がります。
The bridge is the symbol of the battleship, so the “level of completion” will be increased if you put extra efforts to the bridge.
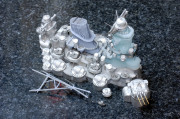
 ここはとにかく細かいパーツが多いので、パーツの紛失や組み立て中の破損によりいっそうの注意が必要です。
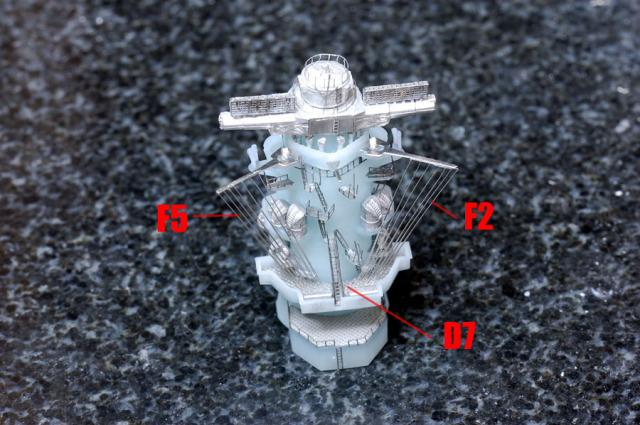
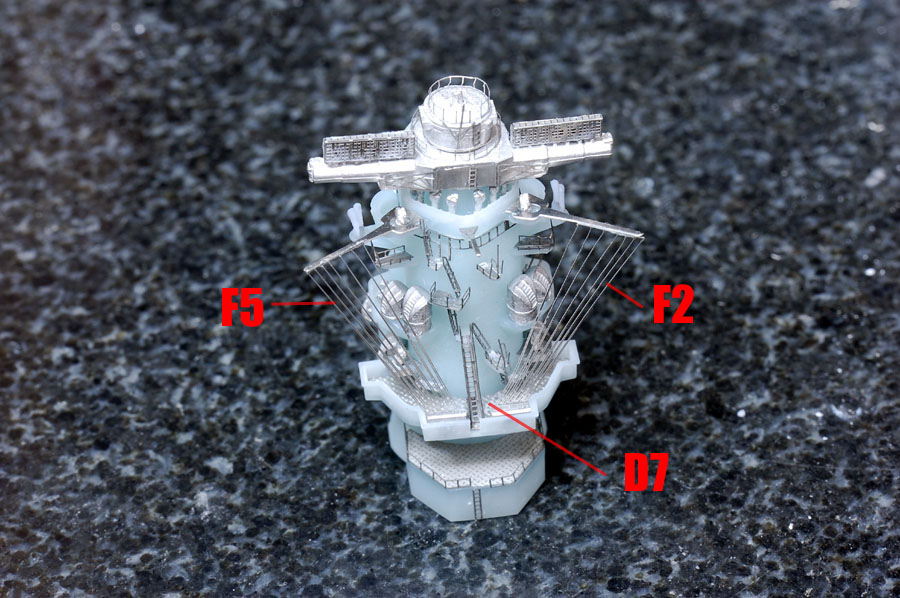
他の注意点としては、エッチングD7が艦橋パーツに対して寸法的にシビアなので、エッチングのゲート処理をしっかり丁寧にやっておく必要あります。
またF5とF2のエッチングは、上部取り付け部であるC49を艦橋に先に付けてから接着すると上手くいきます。
Since the parts for the bridge and chimney are too tiny, beware of missing the parts during assembling.
And the dimension of photo etch D7 is made to be very precise, so pay extra attention when dealing with it.
For assembling part no. F5 and F2, it is better and easier to assemble to have C49 assembled first.
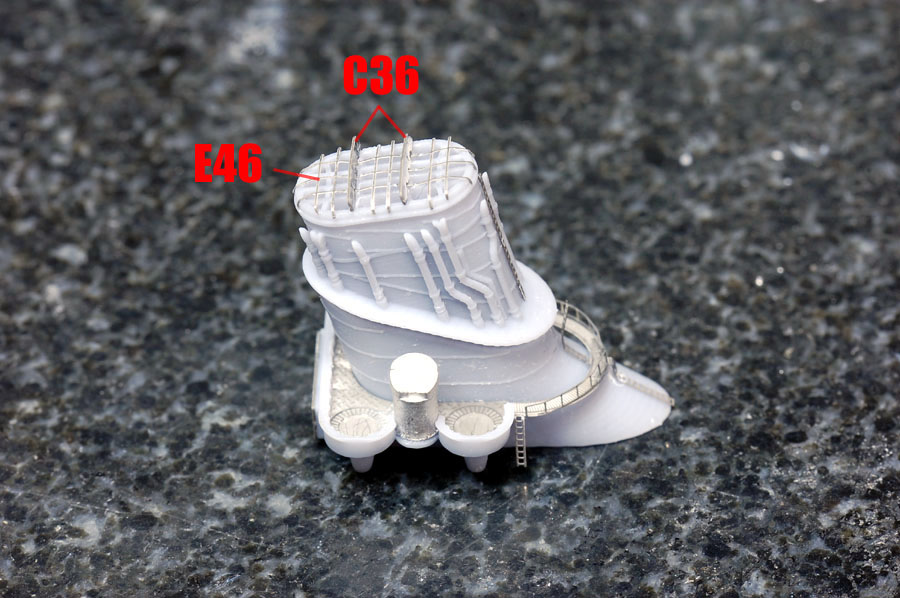
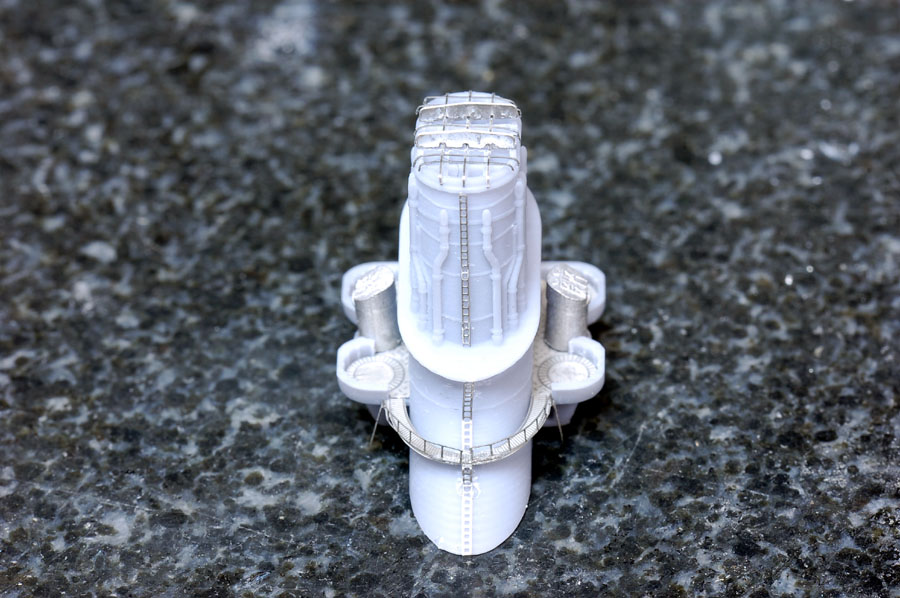
 煙突に関しては、煙突上部のエッチングE46の曲げが少し難しいです。
説明書に表記されてるような曲線になるように少しずつ曲げていきます。煙突パーツに何度も設置して曲がり具合とパーツとの隙間をチェックしつつすすめてください。そしてC36で押さえるように設置して接着します。
About the chimney, a little bit difficult when bending E46.
Bend them gently as stated in the manual. Check the bend of every parts when attaching to the chimney. Apply adhesives to C36 to stack on the top.
 少し難易度が高い部分ですが、目立つ部分でもありますので丁寧な作業を心がけてください。
続きます。
The chimney also containing some parts that is eye-catching. Prepare and assemble them with extra care..
To be continued. . .
MAKING 14 - 1/700scale Multi-Material Kit : Battleship YAMATO
組み立て説明書の順番で進んでいきますので、組む際の参考にしてください。
艦橋と煙突の組み立てです。
Continuing to the making of "1/700scale Multi-Material Kit : Battleship YAMATO".
You may reference to this “making of” article when you assembling the kit.
This update is assembling the bridge and chimney.
 艦橋は戦艦の顔ともいうべき部分ですので、丁寧に仕上げるとぐっと完成度が上がります。
The bridge is the symbol of the battleship, so the “level of completion” will be increased if you put extra efforts to the bridge.
 ここはとにかく細かいパーツが多いので、パーツの紛失や組み立て中の破損によりいっそうの注意が必要です。
他の注意点としては、エッチングD7が艦橋パーツに対して寸法的にシビアなので、エッチングのゲート処理をしっかり丁寧にやっておく必要あります。
またF5とF2のエッチングは、上部取り付け部であるC49を艦橋に先に付けてから接着すると上手くいきます。
Since the parts for the bridge and chimney are too tiny, beware of missing the parts during assembling.
And the dimension of photo etch D7 is made to be very precise, so pay extra attention when dealing with it.
For assembling part no. F5 and F2, it is better and easier to assemble to have C49 assembled first.
 煙突に関しては、煙突上部のエッチングE46の曲げが少し難しいです。
説明書に表記されてるような曲線になるように少しずつ曲げていきます。煙突パーツに何度も設置して曲がり具合とパーツとの隙間をチェックしつつすすめてください。そしてC36で押さえるように設置して接着します。
About the chimney, a little bit difficult when bending E46.
Bend them gently as stated in the manual. Check the bend of every parts when attaching to the chimney. Apply adhesives to C36 to stack on the top.
 少し難易度が高い部分ですが、目立つ部分でもありますので丁寧な作業を心がけてください。
続きます。
The chimney also containing some parts that is eye-catching. Prepare and assemble them with extra care..
To be continued. . .
MAKING 14 - 1/700scale Multi-Material Kit : Battleship YAMATO
MAKING
|
